KeyNode Solutions is dedicated to being at the forefront of all Salesforce related news and releases. Since Flow Builder was released, we have been ecstatic on how we have been able to help our clients incorporate this into their configuration to make automations easier and more efficient. If you have any questions, do not hesitate to contact us at hello@keynodesolutions.com or call us at (858) 215-5371.
Following on from the previous article on Salesforce automation tools, this time we cover automation using the brand-new Flow Builder tool (as released in Feb 2019). This replaces the Cloud Flow Designer tool that relied on Adobe Flash technology.
Previously, we used the Process Builder to make processes, we will now use the Flow Builder to create flows. Commonly just known as “flow”, the Flow Builder supports nearly all the same functions as Process Builder but with some additional functions.
1) It can be used to build interactive user actions,
2) It can be used to delete records and
3) it can create some quite complex automations that would normally require a developer to write Apex code. Overall complexity: High.
A couple of key differences between processes and flows:
- Processes run in the background – you don’t have any interaction with the process you just see the results when they are finished. Flows are interactive – they can request input from the user and branch to a different action depending on that input.
- Processes are triggered by an event like a record being created or updated. Flows are triggered by the user clicking on a button or a link.
You can even combine the best of both tools, triggering a process to run when a record action occurs, performing some background tasks and then executing a flow.
Some typical examples where a flow may be appropriate:
- Guiding a customer service agent through the process of creating a new credit card for a customer with a step-by-step wizard that changes actions depending on the user input.
- Launching a discount calculator for a sales user to calculate the appropriate discount on an opportunity.
- Updating multiple child records when parent record is being updated (i.e. update all Opportunity Products when Opportunity is updated).
Let’s tackle a simple example – creating a new Lead with a simple, four field input form that we will later add to our Home page.
Quick Lead (built with Flow Builder)
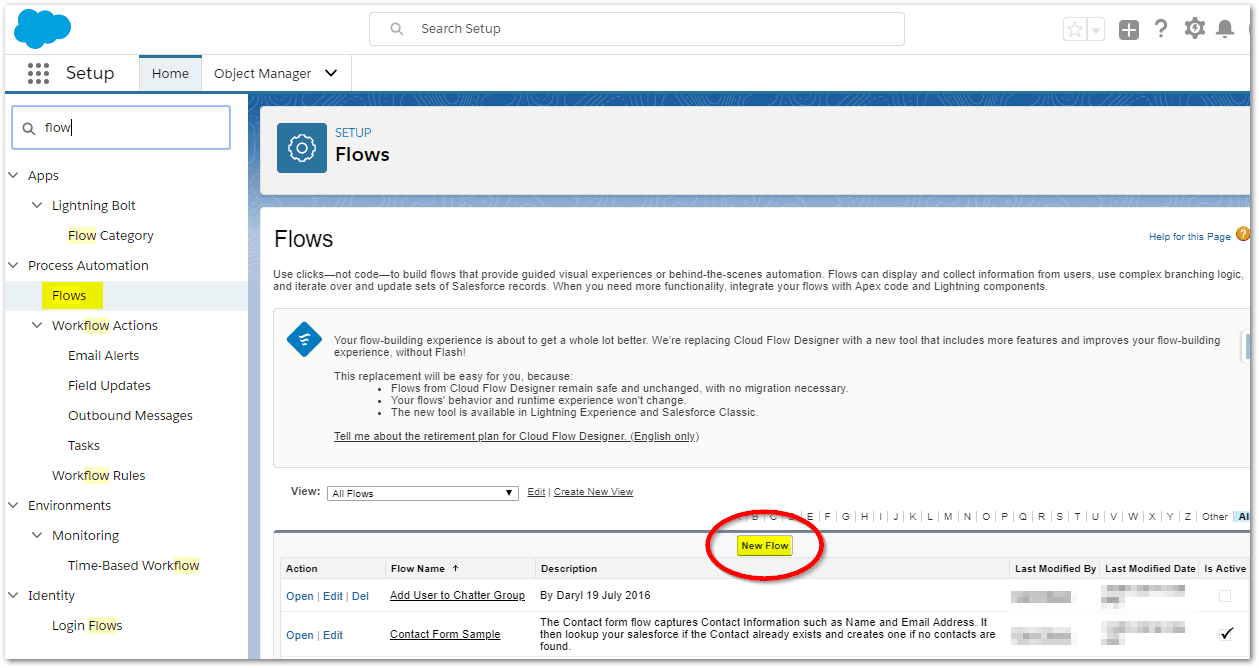
From Setup, enter Flows in the Quick Find box, then select Flows, and then click New Flow.
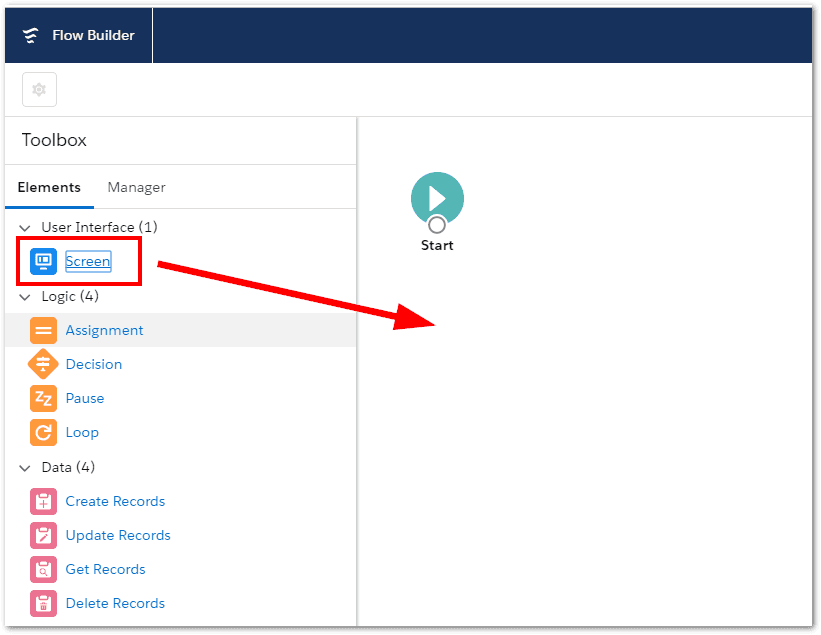
This is the brand-new Flow Builder (released in Spring 19):
From the Palette on the left, drag the Screen element to the space on the right (the canvas).
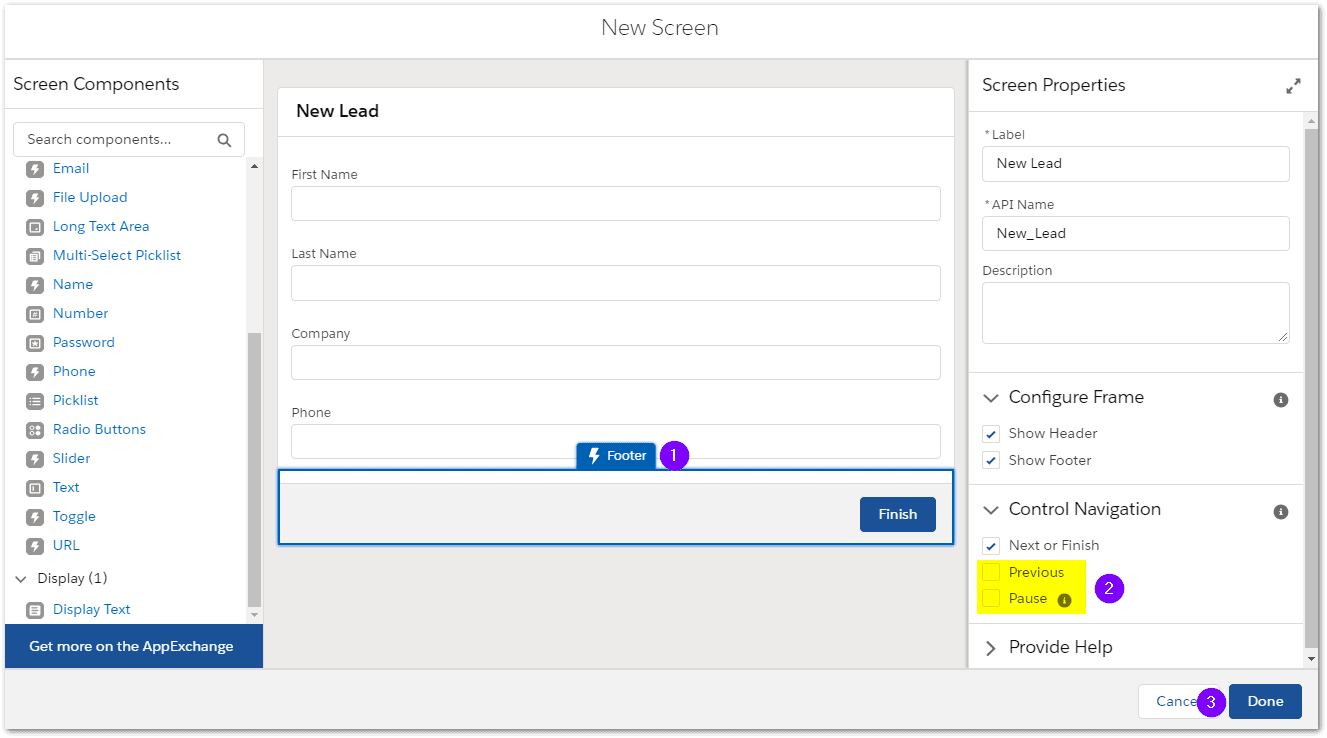
Give it a label eg New Lead (1).
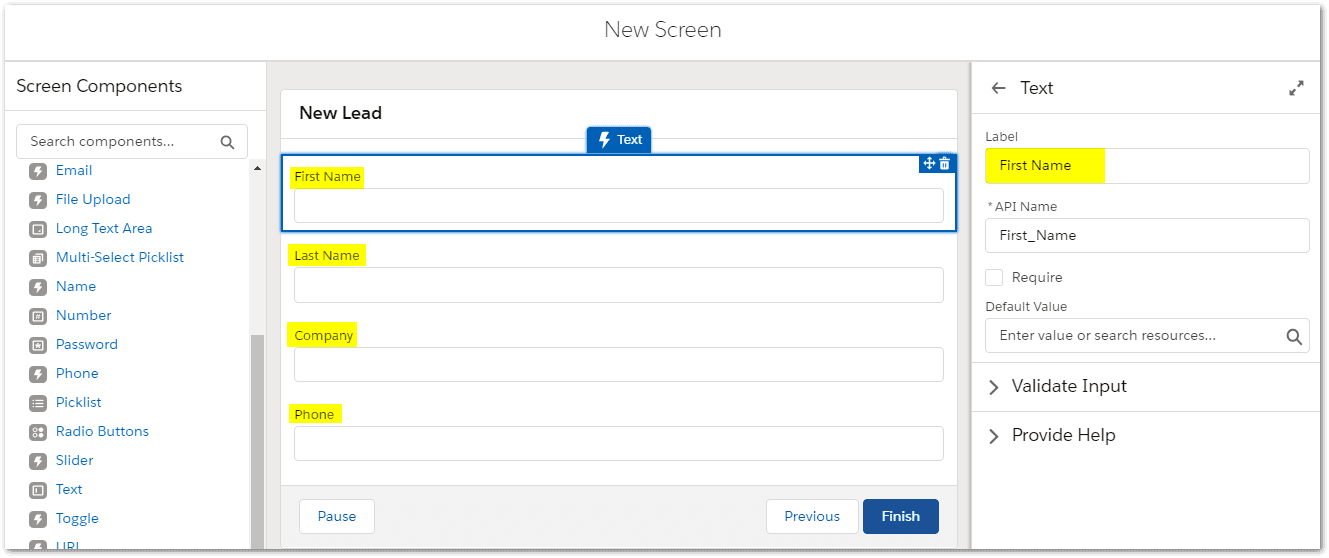
Next, scroll the screen components on the left until you find Text (2).
Drag four of the text fields to the middle panel. (3)
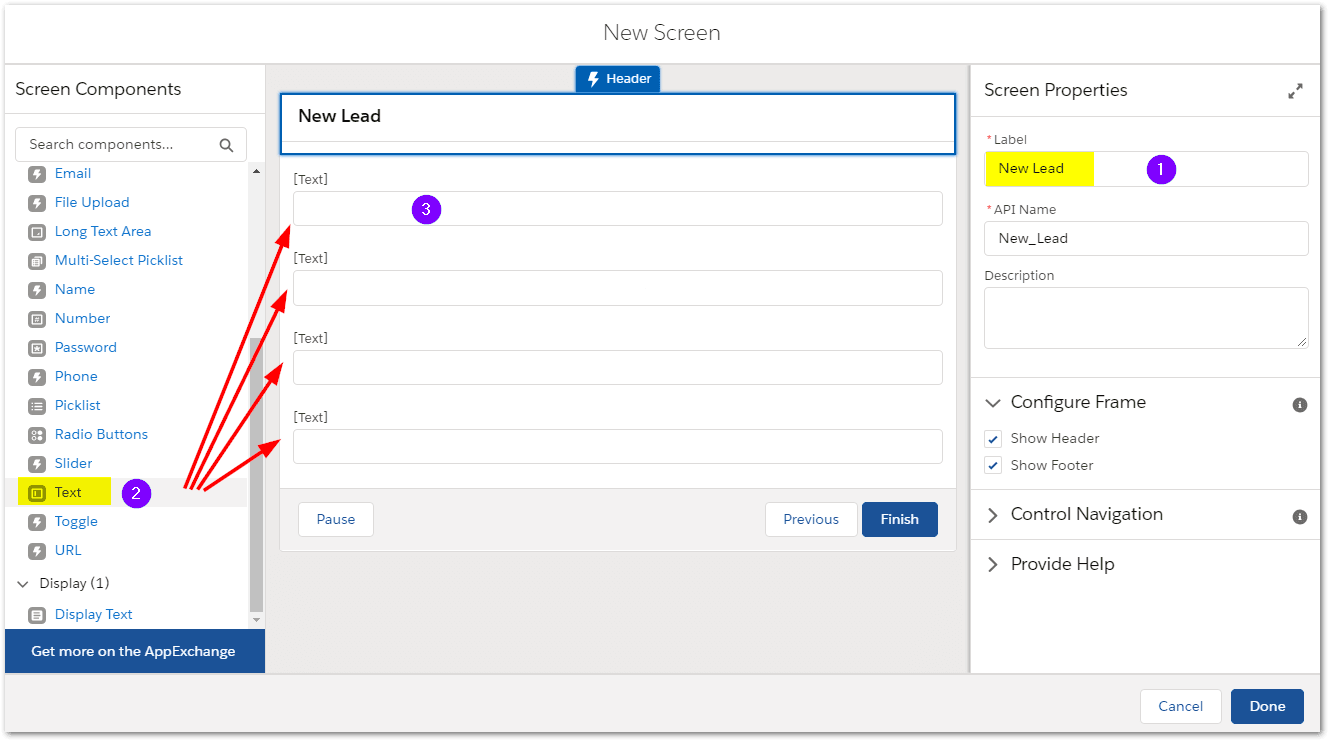
We will now create fields for First Name, Last Name, Company and Phone.
Click on [Text] on each field and name them as shown.
Click in the footer area of the form (1) and untick the Previous and Pause buttons (2) then click Done (3).
Next, drag the Create Records element to the canvas.
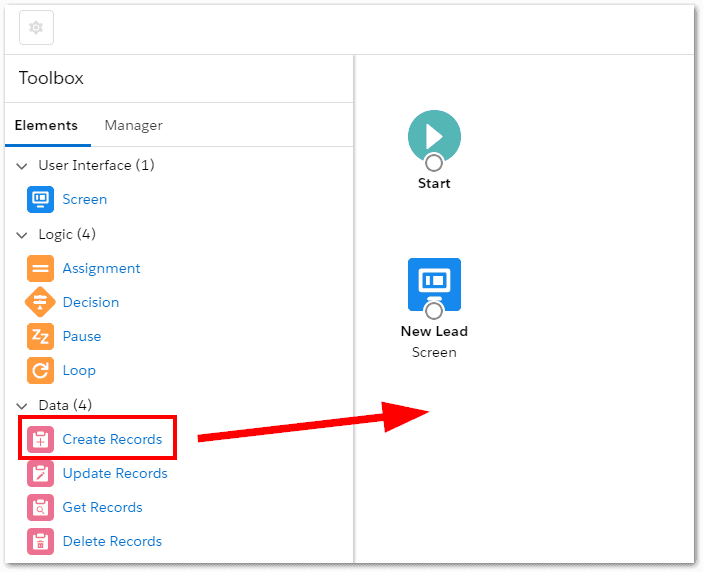
We will use the values collected from that Screen element to create the new lead record.
Drag the Record Create element onto the canvas.
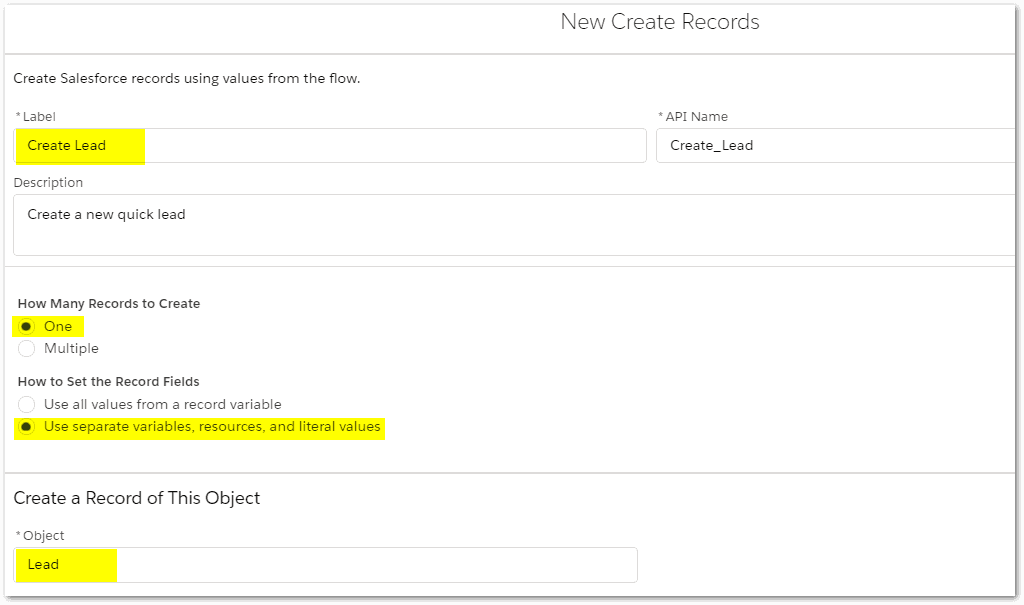
Enter Create Lead as the label
Select One record to create
Select Use separate variables, resources and literal values to set the record fields
Select the Lead object (this is what we want to create records for)
Next, populate the lead fields with the fields from the input form we created.

Click Done when finished.
Next, we need to join the three elements together. Click the circle at the bottom of the Start element and drag down to join to the New Lead screen. Do the same from New Lead to the Create Lead element.
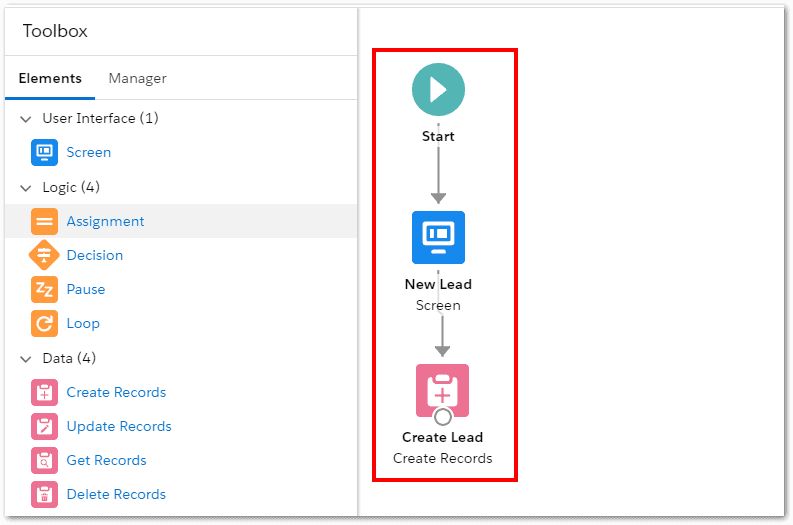
Finally, we can Save our new Quick Lead flow.
Click Save (top right)
Provide a name, description and select Screen Flow as the type.
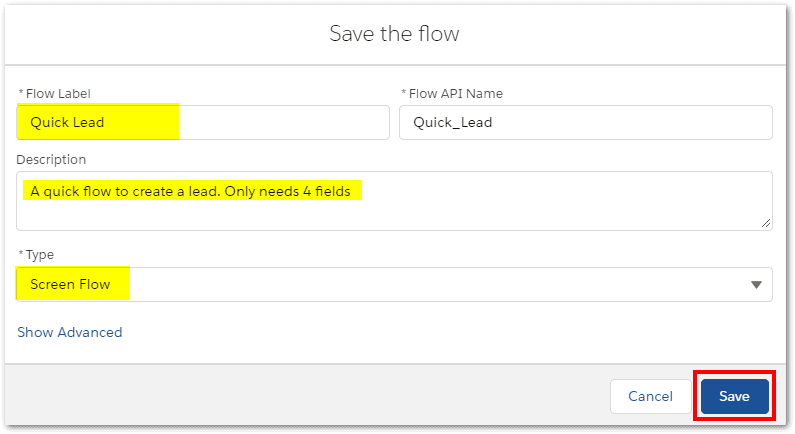
Click Save
Click the back arrow to exit the Flow Builder.
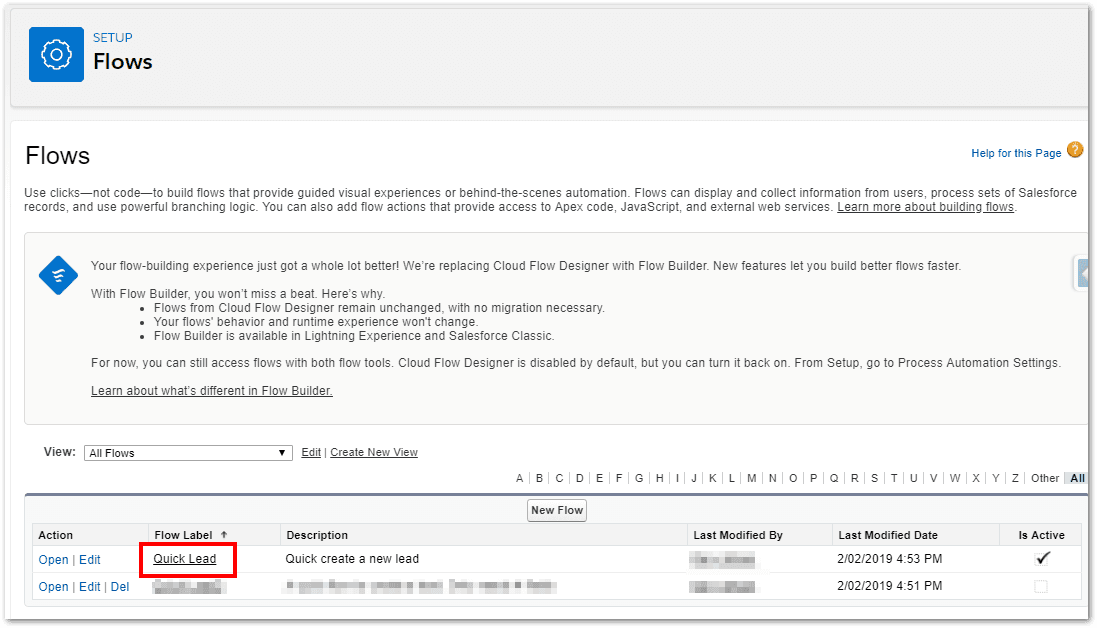
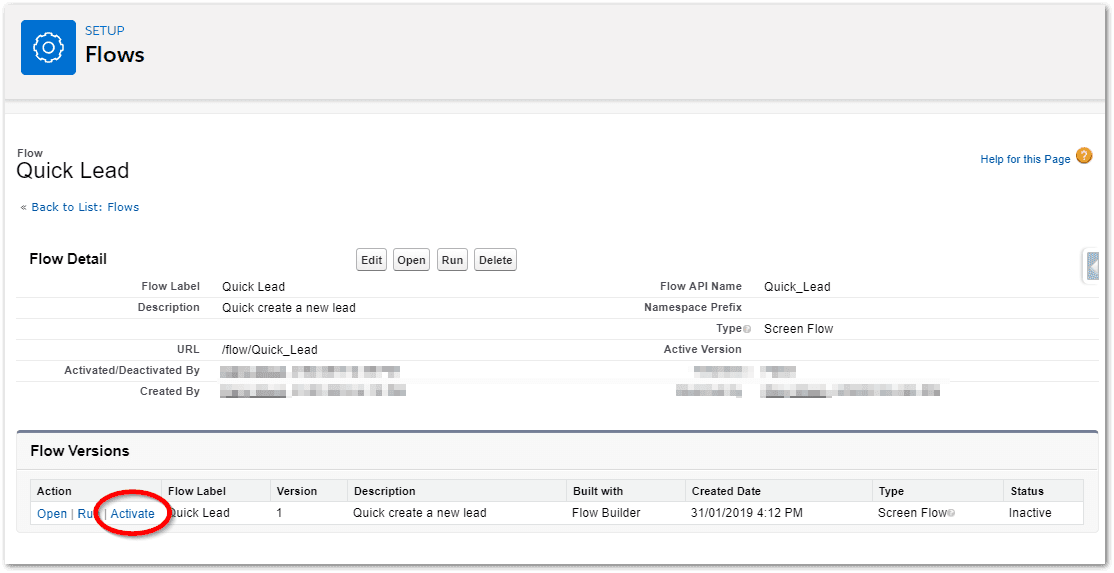
To Activate the new flow, click on the flow name:
Click Activate
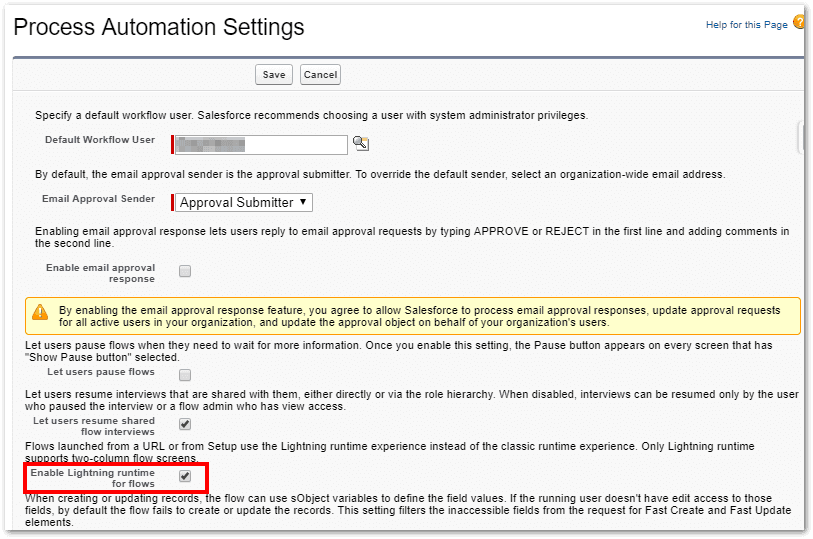
To be able to use this flow in Lightning, we need to Enable Lightning runtime for flows as follows:
Quick Find -> Process Automation -> Process Automation Settings
Select Enable Lightning runtime for flows.
Save your changes.
Add Your Flow to the Home Page
Quick find -> Builder -> Lightning App Builder.
Click New.
Select Home Page, and click Next.
Give the page a name, and click Next.
Click Clone Salesforce Default Page, select Home Page Default, and click Finish.
Drag a Flow component (from side panel on the left) to the top of the right column.
Select your new Quick Lead flow.
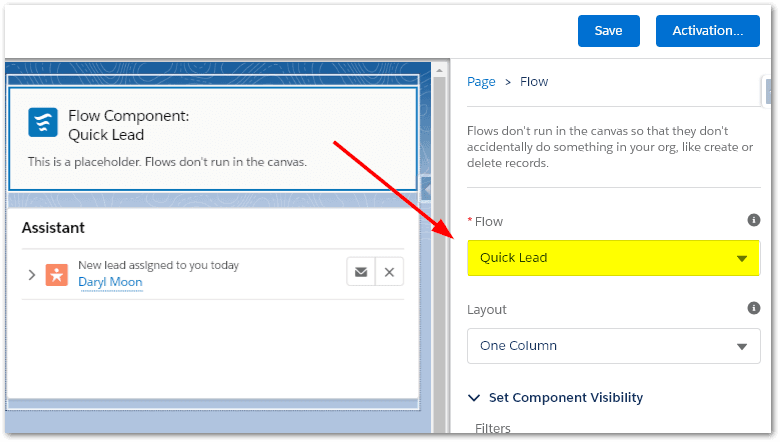
Save and Activate your new Home Page.
Return to your App (eg Sales) and refresh the page (Shift + F5). Your new home page with the Quick Lead Flow component will be displayed.

Test your new flow by entering a new lead via the Flow you have just created. Our Salesforce consultants at KeyNode Solutions like using new Flow Builder very much. It allows them to implement complex business logic via declarative programming. The Flow Builder is more efficient and makes the algorithm move visual than the APEX triggers that you had to use before.
Once you have finished creating the lead, go to the Leads tab and select Today’s Leads list view. Your newly created lead should now be in the list.
Note: You could have added this flow to a button on the Lead page instead.
To read more about Salesforce Automation, visit our blog post on Salesforce Automation, and Salesforce Automation using Workflow Rules and Process Builder. You can also read recent articles on Salesforce Record Triggered Flow here and here.
For help on getting started with the new Flow Builder read https://admin.salesforce.com/getting-started-with-the-new-flow-builder and contact KeyNode Solutions, a leading Riverside Salesforce Consultant Partner who helps clients all across the USA, by dropping us a line at hello@keynodesolutions.com or call us at (858) 215-5371.

Free Salesforce Implementation Assessment
It takes a few minutes and gives you immediate results.
Use this proven tool to find out how Salesforce platform can increase your revenue.
Free Salesforce Implementation Assessment
It takes a few minutes and gives you immediate results.
Use this proven tool to find out how Salesforce platform can increase your revenue.